Crafting the Perfect DIY Lip Balm at Home
Learn how to make your own natural, moisturizing lip balm with this easy DIY recipe. Customize with your favorite essential oils and flavors!
Hey there, fellow lip balm enthusiast! I'm excited to share with you my tried-and-true recipe for crafting the perfect DIY lip balm right in your own kitchen. As someone who's always on the hunt for the best natural lip care, I've experimented with countless ingredients and ratios to create a balm that's both deeply nourishing and delightfully customizable.
Embark on a thrilling DIY journey with this simple lip balm recipe. Whether you're a crafting pro or just starting out, you'll find the process both easy and gratifying. The end result? A lip balm that's tailored to your exact preferences. You'll love having complete control over the ingredients and creating a product that's uniquely yours. So, let's dive in and discover the joys of homemade lip balm together!
Table of Contents:
- Homemade Lip Balm Recipe
- Best Essential Oils for Lip Balm
- Tips for Making the Perfect DIY Lip Balm
- Customizing Your Homemade Lip Balm
- Packaging and Labeling Your DIY Lip Balm
- Troubleshooting Common Issues with Homemade Lip Balm
- Conclusion
Homemade Lip Balm Recipe
Making your own lip balm at home is easier than you might think. With just a few simple ingredients and some basic equipment, you can whip up a batch of custom lip balm in no time.
Ingredients needed
The main ingredients for this DIY lip balm include:
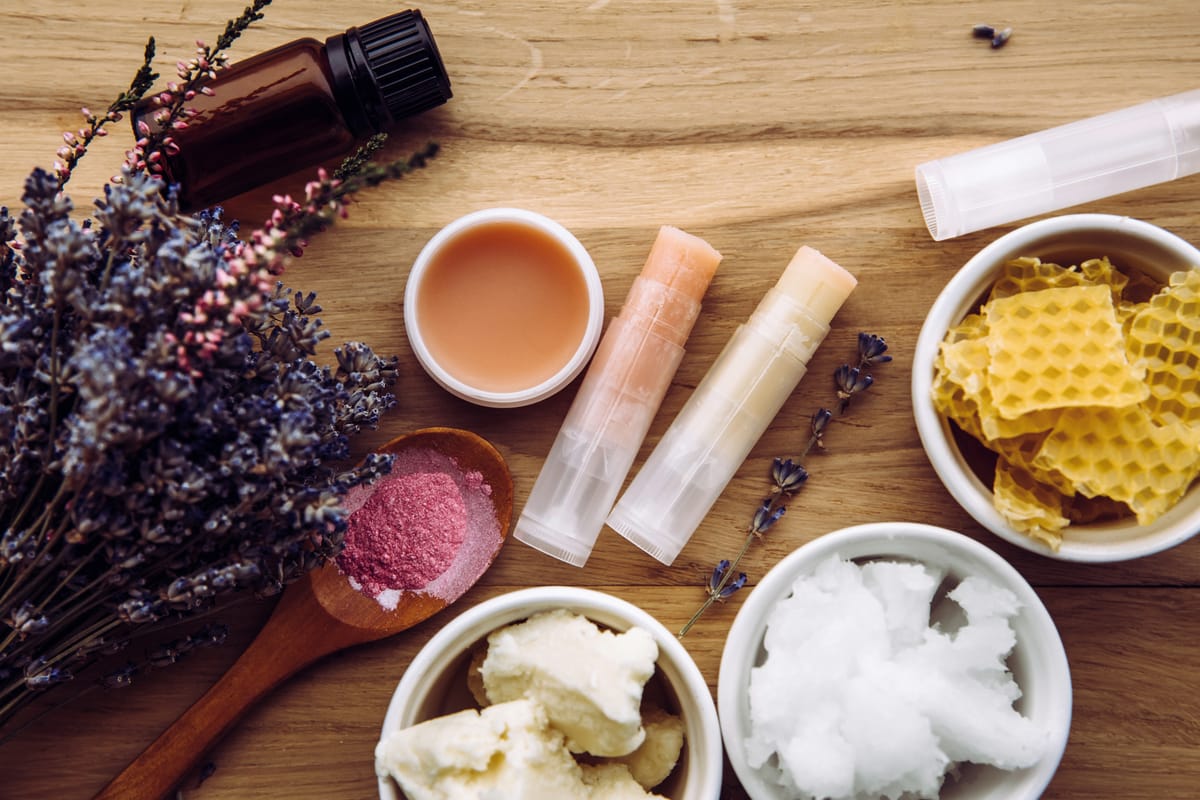
- Liquid oil(s) like coconut oil, sweet almond oil, or olive oil
- A butter such as shea butter or cocoa butter
- Beeswax or carnauba wax to help solidify the balm
- Essential oils for added scent and healing properties (optional)
- Vitamin E oil to help prevent rancidity and prolong shelf life (optional)
When I first started making my own lip balms, I experimented with different combinations of liquid oils, butters, and waxes until I found a recipe that worked well for my lips. Don't be afraid to play around with the ratios to create a consistency you love.
Equipment required
To make your own lip balm, you'll need a few basic tools:
- A double boiler or makeshift double boiler (a heat-safe bowl set over a pot of simmering water)
- Measuring spoons or a digital scale for accurate measurements
- Lip balm tubes or tins to store your finished product
- Stirring utensils like a small whisk or popsicle stick
Having the right equipment on hand makes the lip balm-making process much smoother and more enjoyable. I like to gather all my tools and ingredients before I start so I have everything I need within reach.
Step-by-step instructions
Ready to make your own natural lip balm? Here's how:
- Measure out your ingredients according to your recipe. A good starting point is 1 part beeswax to 3 parts liquid oil and 1 part butter.
- Melt the beeswax, butter, and liquid oils together in your double boiler, stirring frequently until fully combined.
- Remove from heat and let cool for a minute before adding essential oils or vitamin E oil, if using. Stir well to incorporate.
- Carefully pour the mixture into lip balm tubes or tins. Let cool completely before capping or covering.
- Label your creations with the ingredients used and the date made. Store in a cool, dry place.
That's it. Homemade lip balm is a fun and practical project that anyone can do. The hardest part is waiting for your balms to set up so you can start using them.
Best Essential Oils for Lip Balm
One of the best things about making your own lip balm is being able to customize it with your favorite essential oils. Not only do they add a pleasant scent, but many essential oils also have nourishing and healing properties that can benefit the lips.
Peppermint oil
Peppermint essential oil is a popular choice for lip balms because of its refreshing, cooling sensation. It can help soothe chapped or irritated lips and provides a subtle, natural flavor. Peppermint oil is quite potent, so start with just a drop or two per batch and adjust to your liking.
Lavender oil
Known for its calming and relaxing aroma, lavender essential oil is a wonderful addition to homemade lip balm. It can help soothe dry, chapped lips and may even provide some relief from cold sores or other irritations. Lavender pairs well with other oils like peppermint or lemon.
Lemon oil
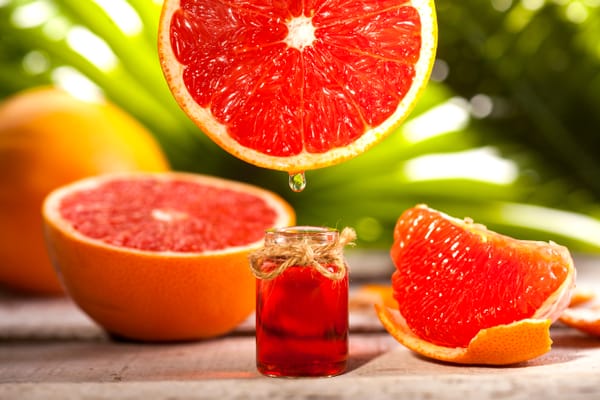
Lemon essential oil has a bright, uplifting scent that can energize and awaken the senses. It's also naturally cleansing and can help exfoliate dead skin cells from the lips. When using lemon oil in lip balm, be sure to use a steam-distilled or expressed variety rather than cold-pressed, as the latter can cause photosensitivity.
Orange oil
Like lemon, orange essential oil has a cheerful, citrusy aroma that can boost the mood. It's less tart than lemon and has a sweeter, more rounded scent. Orange oil is thought to be uplifting and may help reduce feelings of stress or anxiety. It blends beautifully with spice oils like clove or cinnamon.
Cinnamon bark oil
Cinnamon bark essential oil adds a warm, spicy note to homemade lip balms. Its scent evokes feelings of comfort and coziness, making it a great choice for fall and winter. In lip balm, cinnamon bark oil creates a slight plumping effect, temporarily minimizing the appearance of fine lines. Use cinnamon bark oil sparingly, as it can be irritating in higher concentrations. Studies show that a well-formulated lip balm containing nourishing ingredients like essential oils can not only hydrate but also protect the delicate skin of the lips. By choosing high-quality, pure essential oils and using them judiciously, you can create lip balms that are both effective and delightful to use.
Tips for Making the Perfect DIY Lip Balm
Over the years, I've learned a few tricks for making the best possible homemade lip balm. Here are some of my top tips:
Melt ingredients slowly
When combining your lip balm ingredients, melt them together slowly over low heat. This helps prevent the oils and waxes from scorching or separating. I like to use a double boiler setup for more control, but you can also use a microwave if you're careful. Just be sure to stir frequently and keep a close eye on the mixture as it melts.
Use a double boiler
A double boiler allows you to melt your lip balm ingredients gently and evenly, without risk of burning them. If you don't have a proper double boiler, you can easily create a makeshift one by setting a heatproof glass bowl over a pot of simmering water. The steam will heat the bowl gradually, melting your ingredients without direct contact with the heat source.
Let the mixture cool before pouring
Once your lip balm ingredients are fully melted and combined, remove the mixture from the heat and let it cool for a few minutes before pouring it into containers. This brief cooling period allows the balm to thicken slightly, minimizing the risk of spills and making it easier to transfer into tubes or tins. Just don't let it cool completely, or it will start to solidify in the bowl.
Make small batches
When you're first starting out, it's best to make lip balm in small batches. This allows you to experiment with different recipes, ingredient ratios, and add-ins without wasting a lot of materials. Small batches are also easier to melt and pour, and they set up faster than larger quantities. As you gain experience, you can scale up your recipes as desired.
Store in a cool place
To keep your homemade lip balm fresh and stable, store it in a cool, dry place away from direct sunlight and heat sources. Lip balms made with pure beeswax tend to be more heat-resistant than those made with plant waxes, but it's still best to avoid extreme temperatures. I like to keep my lip balms in a drawer or cabinet where they're protected from fluctuations in temperature and humidity. Making your own lip balm is a rewarding and addictive hobby. Once you get the hang of it, you'll want to experiment with all sorts of flavor and color combinations. The possibilities are endless. Just remember to have fun, take good notes, and always label your creations so you can recreate your favorites.
Key Takeaway:
Whipping up your own lip balm is simple and fun, letting you mix and match oils, butters, and essential oils for custom blends. Just melt ingredients slowly to avoid separation, pour into containers after a slight cool-down, and store in a cool place for best results.
Customizing Your Homemade Lip Balm
When it comes to making your own lip balm, the possibilities are endless. You can customize your balm to your heart's content, adding extra moisturizing ingredients, adjusting the consistency, and experimenting with flavor combinations that make your lips sing.
Adding extra moisturizing ingredients
Want to give your lips an extra dose of hydration? Try adding nourishing ingredients like shea butter, coconut oil, cocoa butter, or almond oil to your lip balm recipe. These powerhouse ingredients are like a tall drink of water for your lips. I like to start with just a small amount, around 1/2 to 1 tablespoon of each, so I don't throw off the balance of the recipe. A little goes a long way when it comes to these extra moisturizing ingredients.
Adjusting the consistency
The secret to getting the perfect lip balm consistency? It's all about the ratio of wax to oil. More beeswax pellets will give you a firmer balm, while more oil will make it softer and glossier. I've found that a good starting point is around 1 tablespoon beeswax per 4 tablespoons of oil. But don't be afraid to experiment and find the ratio that works best for you. It's your lip balm, after all.
Experimenting with flavor combinations
Now for the fun part - flavoring your lip balm. The sky's the limit when it comes to flavor combinations. Some of my personal favorites are vanilla-mint, lavender-lemon, and chocolate-orange. I usually start with just a few drops of essential oil per batch and add more to taste. But be sure to use only lip-safe flavor oils or extracts. You don't want to put anything on your lips that isn't meant to be there. Once you master the basic lip balm recipe, you can let your creativity run wild with different flavorings. It's like being a mad scientist, but for your lips.
Packaging and Labeling Your DIY Lip Balm
You've created the perfect batch of homemade lip balm. Now it's time to package it up and make it look as good as it feels on your lips.
Choosing the right containers
Lip balm tubes and tins are the most popular containers for homemade lip balm. Tubes have a more polished look, but can be a bit trickier to fill. Tins are easy to find, affordable, and come in tons of different sizes. When deciding on containers, think about how much lip balm you're making and how you plan to use it. Will you be carrying it around in your pocket? Gifting it to friends? The answers to these questions will help guide your choice.
Creating attractive labels
Your lip balm may be amazing, but the right label can take it to the next level. You can design and print your own labels using blank label sheets and a computer, or get creative with some cute washi tape and markers. Make sure to include the name of your lip balm, the ingredients list, and the date it was made. If you're feeling extra fancy, add a pretty ribbon or twine bow to really make your balm stand out.
Gifting your homemade lip balm
Homemade lip balm makes the perfect gift for any occasion. Package your lip balm in small cellophane bags tied with ribbon, or tuck them into a gift basket with other self-care goodies. I like to include a little tag with instructions for use and the full ingredients list, so my friends and family know exactly what they're putting on their lips. It's a small touch that shows you care.
Troubleshooting Common Issues with Homemade Lip Balm
Even the most experienced lip balm makers run into issues from time to time. Here are some common problems and how to fix them.
Lip balm is too hard
If your lip balm turns out too hard or waxy, you probably used too much beeswax in relation to the liquid oils. Don't worry, it's an easy fix. Simply remelt the lip balm and add more oil, a teaspoon at a time, until you reach the desired consistency. Make a note of how much extra oil you added so you can adjust your recipe for next time.
Lip balm is too soft
On the flip side, if your lip balm is too soft or greasy, you likely used too much oil and not enough wax. The solution? Remelt the balm and add more beeswax, a little at a time, until you get the texture you want. A good rule of thumb is about 1 part wax to 4 parts oil. But remember, the balm will firm up as it cools, so don't go overboard with the wax or you'll end up with a lip balm brick.
Lip balm causes irritation
Sometimes, even the most natural ingredients can cause irritation or allergic reactions. If your lip balm is leaving your lips red, stinging, or itchy, it's time to investigate. Common irritants in homemade lip balm include essential oils, fragrances, and lanolin. If you suspect your lip balm is causing a reaction, stop using it immediately and try making a batch without the potential offender. When making lip balm to give as gifts, it's always a good idea to choose mild, skin-friendly ingredients and avoid common allergens like nut oils. And don't forget to list all the ingredients on the label, just in case. With a little trial and error, you'll be able to troubleshoot any lip balm issues that come your way. Before you know it, you'll be a lip balm making pro, whipping up batch after batch of custom balms that keep your lips happy and healthy.
Key Takeaway:
Master DIY lip balm by starting with the basics, then play around. Add rich ingredients like shea butter for moisture, tweak wax-to-oil ratios for perfect texture, and experiment with flavors to make your lips happy. Remember to package it nicely and label it well when you're done.
Conclusion
And there you have it - your very own custom DIY lip balm! By following this simple recipe and experimenting with different essential oils and add-ins, you've created a lip balm that's perfectly tailored to your preferences and needs.
Get ready to have some fun and show your lips some love with homemade lip balm! Not only will your pout be thanking you for the extra moisture and nourishment, but you'll also get a kick out of crafting something unique. And hey, why not spread the joy by gifting your one-of-a-kind balms to your nearest and dearest?
So go ahead, slather on your new DIY lip balm with pride, and enjoy the satisfaction of knowing that you've created something special using natural, wholesome ingredients. Your lips will thank you!